Salesforce Import Records
Overview
This documentation provides detailed information about the "Salesforce Import Records" connector, which facilitates the import of data from Salesforce into your BuiltAPI Workspace. The connector uses API integration to seamlessly transfer records into the specified target Entity.
Salesforce
Salesforce is a cloud-based customer relationship management (CRM) platform that provides a suite of applications for sales, customer service, marketing, and more. Salesforce allows businesses to manage customer interactions, track leads, and automate various processes to improve productivity and customer satisfaction.
Pre-Requisites
Before you can create a pipeline to import records from Salesforce, you need to have the following:
- Salesforce account with API access
- Salesforce Consumer Key and Consumer Secret for authentication
- User Security Token (for password-based authentication)
How to Obtain Salesforce Consumer Key and Consumer Secret
Log in to your Salesforce account.
Open Setup page by clicking on the gear icon in the top right corner.

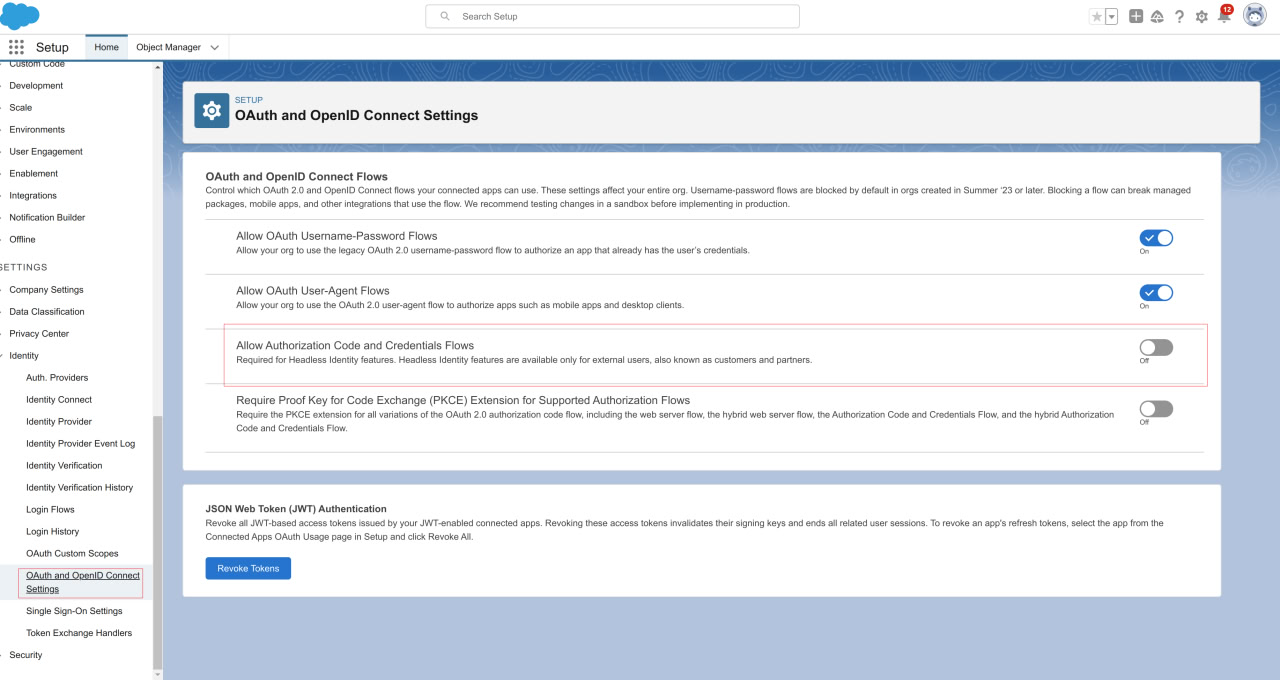
Enable "Authorization Code and Credentials Flows" in Settins/Identity/OAuth and OpenID Connect Settings.
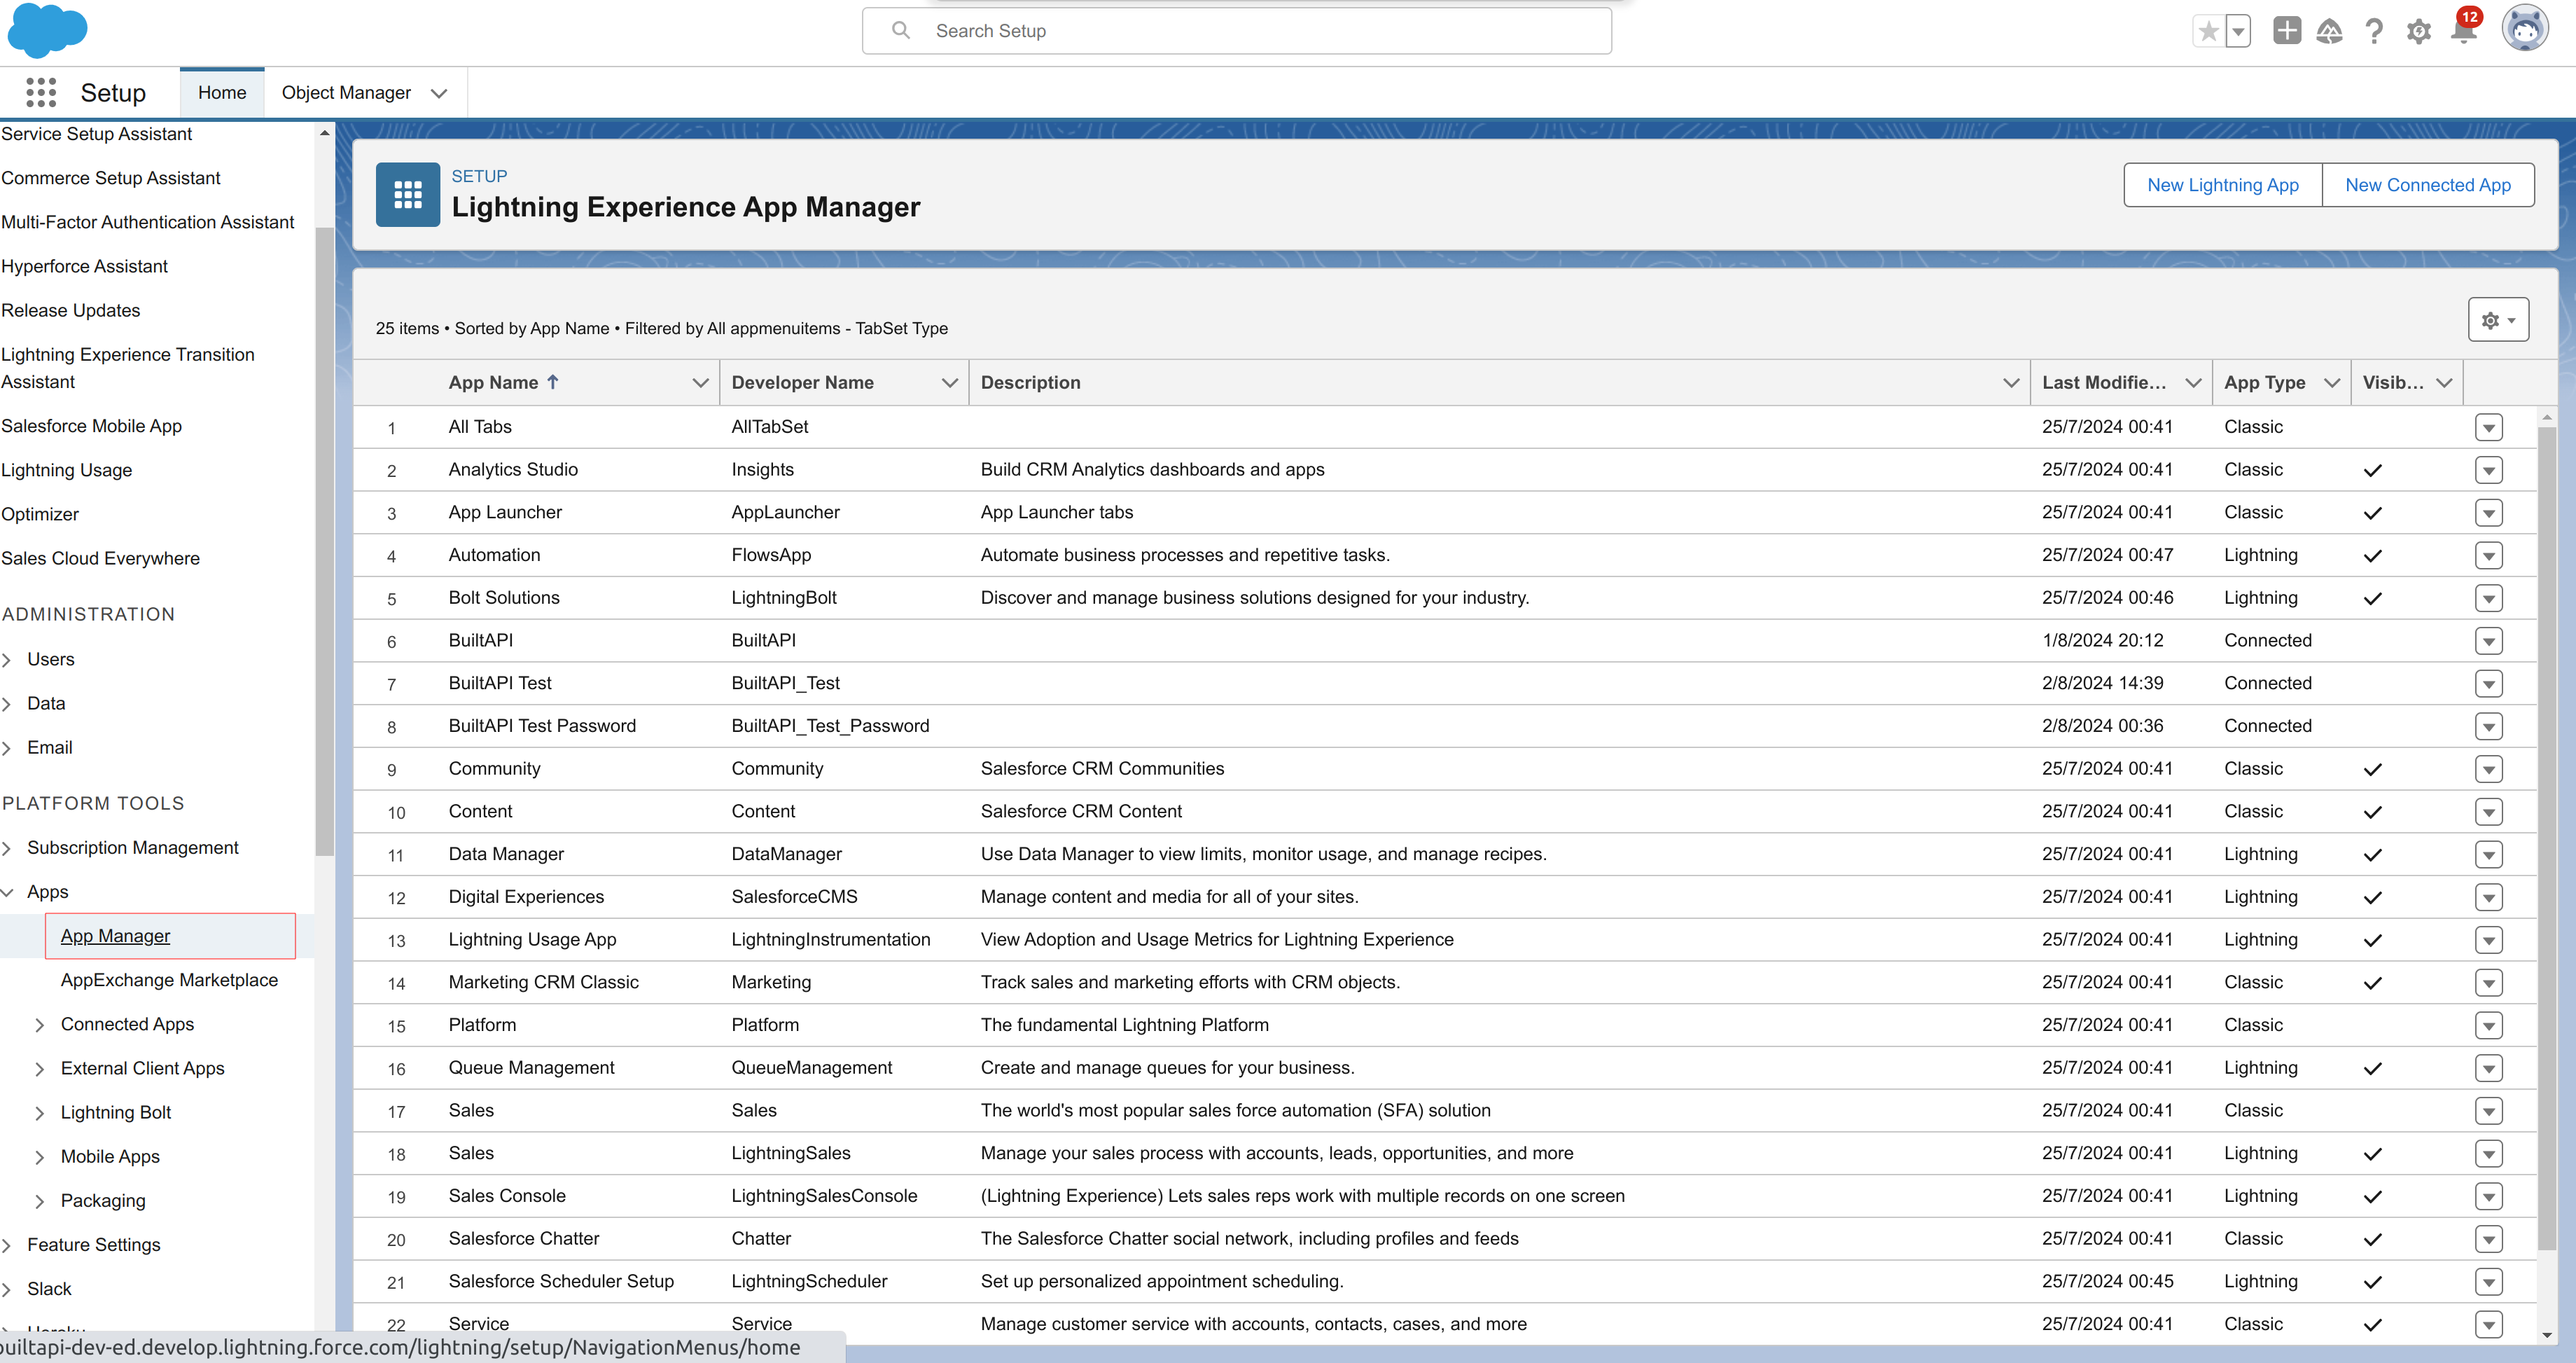
Navigate to the "App Manager" page by typing "App Manager" in the Quick Find box and selecting "App Manager".
Create new connected app, and complete its basic information.
In "API (Enable OAuth Settings)" check the "Enable OAuth Settings" checkbox
- In "Callback URL" enter
https://login.salesforce.com/services/oauth2/callback - In "Selected OAuth Scopes" add the following scopes:
- Access Lightning Experience applications (lightning)
- Check "Enable Client Credentials Flow" checkbox.
- Save your changes.
- In "Callback URL" enter
Select an execution user for the flow. Although there’s no user interaction in the client credentials flow, Salesforce still requires you to specify an execution user. By selecting an execution user, you allow Salesforce to return access tokens on behalf of this user.
- From the connected app detail page, click Manage.
- Click Edit Policies.
- Under Client Credentials Flow, for Run As, click Magnifying glass icon, and find the user that you want to assign the client credentials flow.
- For Enterprise Edition orgs, we recommend that you select an execution user who has the API Only User permission.
- Save your changes.
Obtain the Consumer Key and Consumer Secret from the connected app detail page.
- Find your connected app, click Action dropdown, and then select View.
- Click "Manage Consumer Details" button.
- Salesforce will require you to enter key from email, and then you will be able to see the Consumer Key and Consumer Secret.
- Save the Consumer Key and Consumer Secret for use in the connector.
How to Obtain Salesforce User Security Token
- Log in to your Salesforce account.
- Click on your profile icon and select "Settings".
- In the left sidebar, open "My Personal Information" panel and then click on "Reset My Security Token".
- Click on the "Reset Security Token" button.
- Salesforce will send an email to your registered email address with the security token.
- Use the security token along with your password for authentication in the connector. Example:
mypassword1j7Xk8JFPdxVBDo6CL1BWUAk4
Connector Parameters
Salesforce Settings
This group contains settings specific to your Salesforce instance and the resources you intend to access
Salesforce Base URL
The base URL of your Salesforce instance. Example: https://login.salesforce.com for production salesforce instance or https://test.salesforce.com for test instance.
Salesforce Object
The Salesforce object from which you want to import records. Example: Account
You can find the list of available objects in your Salesforce instance by navigating to Setup > Object Manager.
Salesforce Auth Settings
Configuration settings for authenticating with Salesforce, ensuring secure access to your data.
Salesforce Username
The username of the Salesforce account you want to use for authentication.
Salesforce Password
The password + security token of the Salesforce account you want to use for authentication.
Salesforce Consumer Key
The Consumer Key of the connected app you created in Salesforce.
Salesforce Consumer Secret
The Consumer Secret of the connected app you created in Salesforce.
Target Entity Settings
This group contains settings for the target Entity where the imported records will be stored.
Target Entity
The Entity in your BuiltAPI Workspace where you want to store the imported records.
Pipeline Creation Process
Follow these steps to create a pipeline for importing records from Salesforce:
- Obtain Salesforce Credentials: Gather the necessary credentials, including Salesforce Base URL, Salesforce Object, Salesforce Username, Salesforce Password, Salesforce Consumer Key, Salesforce Consumer Secret
- Open Pipeline Editor: In your BuiltAPI Workspace, navigate to the Pipelines section and click on the "Create Pipeline" button.
- Select
Salesforce Import RecordsConnector: From the list of available connectors, choose theSalesforce Import Recordsconnector. - Configure Connector Parameters:
- Enter the Salesforce Base URL, Salesforce Object, Salesforce Username, Salesforce Password, Salesforce Consumer Key, Salesforce Consumer Secret.
- Select or Create the Target Entity where you want to store the imported records.
- Click on "Create pipeline" button
- Set schedule:
- Open "Schedule" tab
- Click on "+ Create Schedule" button
- In the "Create Schedule" window, configure the schedule settings
- Click on "Create schedule" button
Validation and Debugging
- Check last run status and logs to verify if the pipeline executed successfully.
- Inspect the target entity to ensure that the imported data is stored correctly.